


The answer is that a leak does not automatically mean a failed gasket, and until three things are established—where the oil is escaping, whether the housing carries an oil cooler, and how many different part numbers sit under the same model name—nothing written on the order sheet can be relied upon. The sequence that follows moves from locating the leak to reading the housing layout, verifying the part number and placing the order, and states at each step what to look at and what to ask the workshop.
The component itself is worth describing first: an oil filter housing is an aluminum casting bolted to the side of the engine that holds the oil filter element, and a rubber seal—usually called a gasket or an O-ring—is clamped between it and the cylinder block. Oil escaping across that joint is what is commonly described as an oil filter housing gasket leak. An order here means the parts list a buyer sends to a supplier, rather than a repair quotation.
Where the oil actually starts
Oil runs down the block and is carried backwards by the airflow, so a wet area is not necessarily the source
An inspection from above and one from below frequently produce different answers, since oil from a valve cover gasket can travel as far as the edge of the sump and oil from the housing-to-block joint can collect on the pipework underneath; the judgement therefore rests on how fresh the trace is and how high it sits, not on how large the wet area is. Leaks of this kind are easily mistaken for a cylinder-head gasket failure, whereas in most cases they resolve to the housing seal, and because the two belong to different part families they are filed separately in the oil filter housing category as well.
Work downwards from the top, taking the highest and freshest trace first
Elimination starts at the top of the engine and works downwards section by section, with fresh oil appearing light and free of dust while older deposits are dark and tacky. Because the housing sits high on the side of the block, the housing seal only becomes the candidate once the highest and freshest trace falls exactly on the joint between the housing and the cylinder block; Table 1 sets out this sequence by observation point.
When one inspection is inconclusive, clean the area and recheck it, using UV dye where necessary
A short recheck after cleaning shows where the oil reappears, and where repeated soaking has made fresh and old traces indistinguishable, UV dye can be added to the oil and the starting point located under an ultraviolet lamp; both methods serve to find the origin rather than to substitute for the workshop's own decision to strip and inspect.
Oil reaching the drive belt deserves separate attention: on some inline-six layouts the housing sits directly above the belt, which then swells, slips and frays on contact, and debris can be drawn in behind the crankshaft pulley; what has to be dealt with in that case is the source of the leak, the belt being merely a part caught up in it.
Table 1. Leak-source elimination sequence. Listed from the top down, each row begins with what the workshop can see and ends with where the order should go; the size of the wet area is not the criterion.
| What the workshop sees | What it indicates | Next step |
|---|---|---|
| Fresh oil at the top of the engine, around the valve cover | The source is above the housing; rule out the upper sealing surfaces first | Do not order housing seals on this evidence; ask the workshop to recheck the upper area |
| The highest, freshest trace sits on the housing-to-block joint | The mating-face seal is the main suspect | Move to the next step: establish whether the housing carries an oil cooler |
| Only the sump and the lower edges of the pipework are wet; everything above is clean | Oil has run down from above, so the position alone is not enough | Clean the area and recheck, or add UV dye to locate the starting point |
| The drive belt is oily and there is a trace along its upper edge | The housing sits above the belt, so the source is likely in this area | Locate the highest trace and record the condition of the belt at the same time |
| Oil visible in the coolant, or coolant in the oil | The leak is on a second, internal sealing path inside the housing | Do not order only a seal kit; check the cooler seals and the housing first |
What the seal does and why it hardens
An O-ring or a flat gasket sits between two metal faces and fills the joint by rebounding after compression
An O-ring is a rubber ring of round section and a flat gasket is a molded rubber sheet, and although they are fitted in different positions their function is the same: to form a compressible barrier between the housing and the cylinder block; the bolts merely bring them to their working position, since sealing depends on the rebound of the rubber itself rather than on how tightly the fasteners are tightened.
Repeated heating and cooling harden and flatten the rubber until the rebound is almost gone
Each warm-up and cool-down of the engine expands and contracts the seal, and over time the rubber hardens, becomes brittle and retains the shape it was pressed into, so that it no longer fills the gap and oil seeps slowly out across the mating face; because this is a gradual process, a leak usually appears first as a film of oil mist before it becomes a visible stain.
Ageing of the material and traces left by earlier assembly work produce the same stain but lead to different orders
Ageing points to a replacement seal kit, whereas an old ring left on the seat or a flange distorted by overtightening points to redoing the previous assembly; both present on the vehicle as a wet joint and cannot be separated by the phrase gasket leak alone. Human factors such as an O-ring that was not fully removed or an incorrectly preset torque wrench belong to the second category, and distinguishing between the two before the order is written is what avoids a second delivery.
When a gasket kit is the wrong order
In a housing that carries an oil cooler, an internal seal separates the oil from the coolant
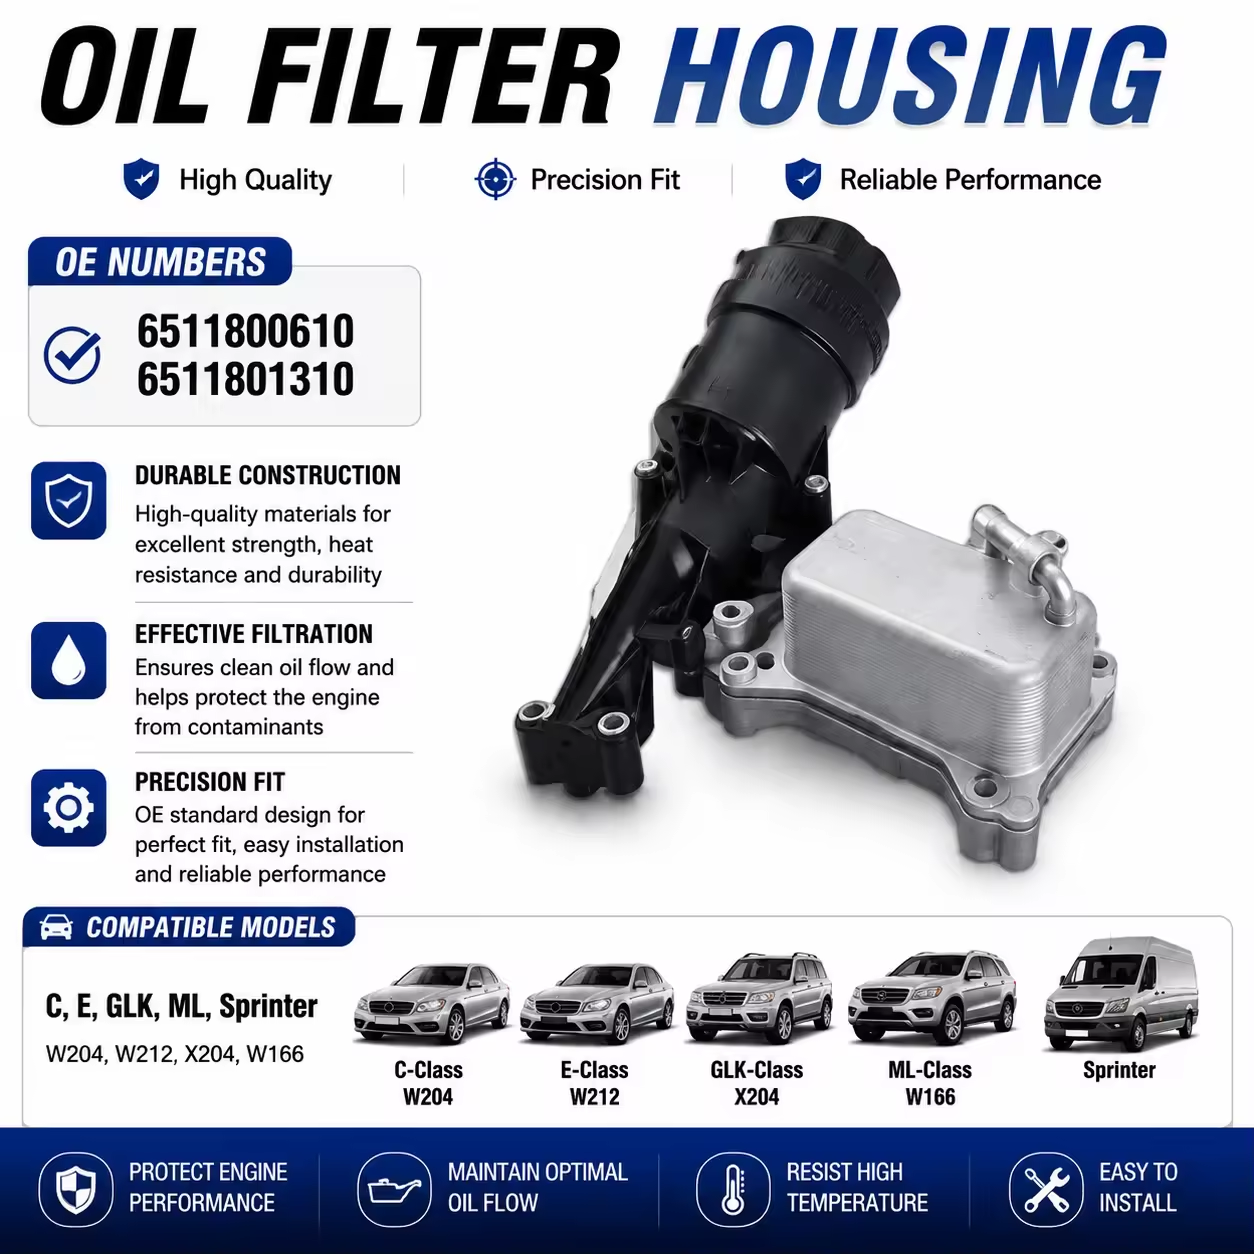
The oil cooler is mounted directly on the housing and a separate set of seals keeps the two fluids apart, which means such a housing has two paths that can fail: an external one, where oil escapes across the mating face onto the surface of the engine, and an internal one, where the two fluids mix inside the housing; a fault on the second path cannot be corrected by replacing the outer gasket. Which components of the cooling circuit tend to fail first is set out separately in the cooling system guide.
When oil and coolant mix, the gasket, the cooler seals and the housing itself have to be told apart first
Cross-contamination can occur in all three scenarios, but the solutions differ: for gasketed pipes, the issue is the outer seam; for cooler seals, it involves isolating the two internal channels; and if the aluminum housing develops a crack or the mating surface becomes deformed, no seal will be able to prevent leakage. A conclusive diagnosis can only be made through disassembly and inspection in the workshop; therefore, parts purchasers should bring this issue to the workshop's attention before placing an order.
A cracked or deformed housing belongs on the order as a complete assembly rather than a seal kit
A housing is a formed casting, and neither a crack nor a distorted mating face can be compensated for by a new gasket; in such cases a seal kit is only a line of accessories on the order while the main item is the complete housing assembly. It would be equally wrong to make this the general rule, since most leaks still involve nothing more than the mating-face seal, and Table 2 is therefore organized by the evidence found rather than by model name.
Table 2. Seal kit or complete housing: decision table. Each criterion comes from a visible result of disassembly and inspection, and the rows are grouped by that result rather than by model name.
| Evidence found | What to order | What to ask the workshop |
|---|---|---|
| Fresh oil on the mating face, coolant normal, housing visually sound | Seal kit | Whether the housing carries an oil cooler; which seals the kit contains |
| Housing carries an oil cooler, external seepage only, no mixing of the two fluids | Seal kit matched to that housing, including the cooler-interface seals | Whether the interface seals are being replaced at the same time; photographs of the old part |
| Oil and coolant mixed, and inspection confirms the cooler-interface seal | Cooler seals, and the housing as well where necessary | Whether the housing is cracked; whether the mating face is flat |
| Housing cracked, mating face distorted or threads damaged | Complete housing assembly, with seals supplied alongside | OE number of the old part; whether a cooler is fitted; engine code |
| Leak continues after a seal change; old ring or tightening marks visible on the seat | Redo the assembly first and hold any further order | Record of the previous assembly; how the seat was cleaned |
The amount of work depends on how accessible the housing is and whether an oil cooler is fitted, both of which vary with the model and the engine layout; a parts buyer does not need to judge this from a quoted figure.
Why a chassis code is not enough to order
A single chassis code covers several housings that cannot be interchanged
The product pages on this site list 109 distinct entries in the oil filter housing category, of which 56 sit under E46, 9 under W205, 7 each under W203 and W204, and 5 under W202; these are not duplicate pages for one part but entries with different part numbers, different connections and different cooler configurations, and the differences can be read entry by entry in the oil filter housing category. Table 3 sets out that distribution for one purpose only: to show that ordering by model name runs into several part numbers.
Table 3. Product page distribution by chassis code. The table covers 108 product page entries, with one category archive page in addition; the counts show only how many choices exist under a single code, and are neither stock figures nor a fitment promise.
| Chassis code | Product page entries on this site | What this means |
|---|---|---|
| E46 | 56 | The widest range under one code; ordering by model name will almost certainly hit the wrong number |
| W205 | 9 | Needs the OE number and the cooler configuration to narrow it further |
| W203 | 7 | More than one entry; look at the connections on the old part first |
| W204 | 7 | Do not treat the fitment page as a part number |
| W202 | 5 | Few entries still does not mean one housing |
| Other chassis codes | 11 | Spread across W176, W210, E36, F46, W222 and other generations |
| Named by part number only, with no chassis code | 13 | A second naming convention exists for the same category, so a code-based search will not find everything |
What narrows the field to one specific part is the OE number on the old component; a model name only turns the catalogue to roughly the right place.
Engine codes and production batches change the part number, and a model name will not tell you either
Vehicles of the same generation may be equipped with different engines, and vehicles from different production batches may also use different engine blocks; the only way to confirm which one it is is to examine the old parts and the vehicle records. These differences are ultimately reflected in the part number, not in the model name. Asking the workshop for the engine code and photos of the old parts is far more useful than repeatedly trying to confirm whether it's a W204; even consulting the chassis compatibility sheet will only narrow the range by one step and still won't pinpoint the part number.
The OE number identifies one part; cross-reference aligns different numbering systems
An OE number is the identity of a part within the vehicle manufacturer's numbering system, and the same part often carries other numbers in the independent supply chain; cross-reference is the process of matching those numbers so that both sides are known to be discussing the same item. How such numbers are read is covered in the part-number guide, while the terms OEM, OE and aftermarket are defined in the terminology guide, and the relationship between independently sourced parts and a vehicle warranty is set out in published provisions of the US rules on written warranties.
Checking one part against one number before the order is placed is considerably less troublesome than returning goods after they arrive, and the part number has to come from the old component or the vehicle records; a number inferred from a model name cannot be used.
A five-field check before the order goes out
Each of the five fields comes from the old part, the vehicle records or a workshop inspection
The OE number is taken from the old part itself or from the vehicle records, the chassis and engine codes come from the vehicle records, and the presence of an oil cooler and the list of seals are confirmed once the workshop has stripped and inspected the assembly; a parts buyer need not determine the housing layout personally, but does need to be able to say who to ask for each field.
Photographs need to show both faces of the old part, the housing connections and the cooler connections
Photographs exist so that the supplier can see details a written description tends to omit: both faces of the old part, the face that mates with the cylinder block, whether a cooler connection is present, and the condition of the seat once the old ring has been removed; a single photograph of the whole engine bay cannot establish the part number.
Hold the order when a field is missing, and do not fill it with a model name
Of the five fields, the absence of either the OE number or the cooler configuration makes it impossible to narrow the choice to one part, so the missing information has to be requested rather than replaced on the order by a guess such as the W204 version; even the part-number search is only useful once the fields are complete.
Table 4. Five-field verification protocol. The five fields decide which part is written on the order and are handled separately from sample approval and commercial terms.
| Field | Where it comes from | Action when missing |
|---|---|---|
| OE number | Marking on the old part, vehicle records | Hold the order and request photographs of the old part or a screenshot of the records; do not infer it from the model name |
| Chassis code | Vehicle records | Ask the workshop; the code only narrows the field and cannot replace the part number |
| Engine code | Vehicle records, engine identification plate | Request it before matching the part; one generation may be fitted with different engines |
| Whether an oil cooler is fitted | Workshop inspection, photographs of the old part | Needs to be confirmed, with no order placed beforehand; it determines the housing layout and the sealing paths |
| List of seals | The physical parts after removal, the kit contents | Ask the workshop to state which seals are included, so that the outer one is not the only one ordered |
| Photographs (supporting material, not one of the five fields) | The workshop, on site | At least both faces of the old part and both connections; request further photographs if they are missing |
After the repair: when the leak comes back
A new ring fitted over an old one left on the seat cannot be compressed evenly
This is a familiar rework trap, often called a double O-ring: the old ring is stuck in its groove by oily sludge and can easily be taken for removed, and once the new ring is stacked on top the bolts compress the joint to the wrong height, so the rubber is squeezed out or pushed off-center and the gap becomes wider rather than narrower; two impression marks visible on disassembly make the cause clear.
One typical case runs as follows: the workshop reports that the gasket was replaced and the leak persists, the supplier sends a second seal kit, and inspection then finds the old ring still on the seat with the new one compressed into a skewed sheet; neither delivery resolves anything, because what is leaking is the assembly rather than the part.
Overtightening and an incompletely cleaned seat both leave marks that can be checked
Fasteners taken past their limit can distort the flange and force the seal out of its groove, while old rubber, sludge and sealant left on the seat prevent the new ring from seating fully; both leave visible evidence in the form of a skewed ring, a polished extrusion face or black residue that cannot be cleaned away, and where such marks are present the assembly should be redone instead of another order being added.
A leak first noticed after an oil change is not necessarily caused by that oil change
An oil change and the discovery of a leak often sit close together in time, simply because the trace becomes easy to see when the vehicle is raised and someone is working underneath it; treating that sequence as cause and effect leads to conclusions such as fresh oil having attacked the gasket, whereas what actually counts is the condition of the seat and the point where the oil trace begins.
Whether the assembly was carried out correctly is for the workshop to determine by disassembly; what a parts buyer needs to take from it is that a rework problem should not be answered with another delivery of parts.
Where the order is decided
- 01Establish the source. Request a description of where the highest and freshest trace sits, together with the result of a post-cleaning recheck where necessary; if the source is not on the housing-to-block joint, no housing seal should be ordered.
- 02Determine the housing layout. Ask whether an oil cooler is fitted and whether the housing is cracked or its mating face distorted; where a cooler is present or the casting itself is at fault, the main item on the order becomes the complete housing or the corresponding assembly.
- 03Verify the part number. Locate it from the OE number of the old part using the part-number search, and where numbering systems have to be compared use cross-reference, with the scope of the category shown in the oil filter housing category; the chassis code serves only as a cross-check and does not fix the part.
- 04Complete the fields before requesting a quote. Attach the five fields and photographs of the actual part when entering the quote page or the search; missing fields should be requested first rather than filled with a model name.
Once those four steps are complete, the order carries one verifiable part rather than a model name followed by the word leak; the leak is the symptom, and the part number is the order.
Common questions
- How serious is an oil filter housing leak?
- Severity depends on where the oil goes rather than on how much has escaped: oil dripping onto the drive belt has to be dealt with first, whereas a film of mist below the housing can wait for a recheck before anything is decided. A belt soaked in oil swells, slips and frays, and debris can be drawn in behind the crankshaft pulley, which is collateral damage rather than a second fault; whether the vehicle can continue in use is for the workshop to decide, while for a parts buyer this information determines whether belt-related components should be checked at the same time.
- How much does it cost to fix an oil filter housing leak?
- The scale of the work is set by how accessible the housing is and whether an oil cooler has to come off, which is a separate question from the price of the seal kit itself. Repair quotations vary with the model, the region and local labor rates and belong to the workshop's side of the transaction; what a parts buyer has to verify is which single part appears on the order, and the two should not be conflated.
- Is it expensive to fix a gasket leak?
- The seal kit itself is not the main variable; whether a complete housing is needed is. If inspection reveals a cracked housing or a distorted mating face, the main item on the order changes from seals to a housing assembly and the number of fields to be checked increases accordingly; the decision follows what the inspection shows, not a guess based on price.
- How to fix an oil filter housing leak?
- Establish the source first, then determine whether the housing carries an oil cooler, verify the part against the OE number of the old component, and only then place the order. Those four steps replace the question of how to repair the vehicle with the question of what to order: the repair procedure belongs to the workshop, while the parts buyer is responsible for making the order correspond to one specific part.
- Why is oil leaking after replacing oil filter housing gasket?
- In most cases the previous assembly has to be redone; the new seal is not defective. Check first whether an old O-ring was left on the seat and whether the seat was cleaned properly, then look at tightening marks and the starting point of the oil trace; stacked O-rings, a distorted flange and residue on the seat all prevent the new ring from seating evenly.
- Is oil filter housing leak common after gasket replacement?
- It is common, but the causes cluster around assembly work rather than a faulty batch of seals. Recheck the seat and the assembly before deciding whether further parts are needed; keeping a photograph of the seat on file is considerably more useful than arguing about the quality of the part.
- What is an Oil Filter Housing Gasket and What is its Purpose?
- It is the rubber seal clamped between the oil filter housing and the cylinder block, closing the gap between the two metal faces by rebounding after compression. It is usually an O-ring or a flat gasket, and once it hardens and flattens its rebound diminishes so that oil seeps out across the mating face; a housing that carries an oil cooler also contains a second, internal seal with a different function.
Got a part number or a VIN? Get availability and price — we reply within four business hours with price and lead time attached.